SPEECH-TO-TEXT

GETTING STARTED
Effortlessly convert spoken words to written text with our Speech to Text Module. Our advanced technology ensures accurate transcriptions, saving time and boosting productivity. From meetings to lectures, streamline the process with ease and unlock the power of speech recognition for enhanced efficiency in your workflow.
FEATURES
1. Transcription of live stream:
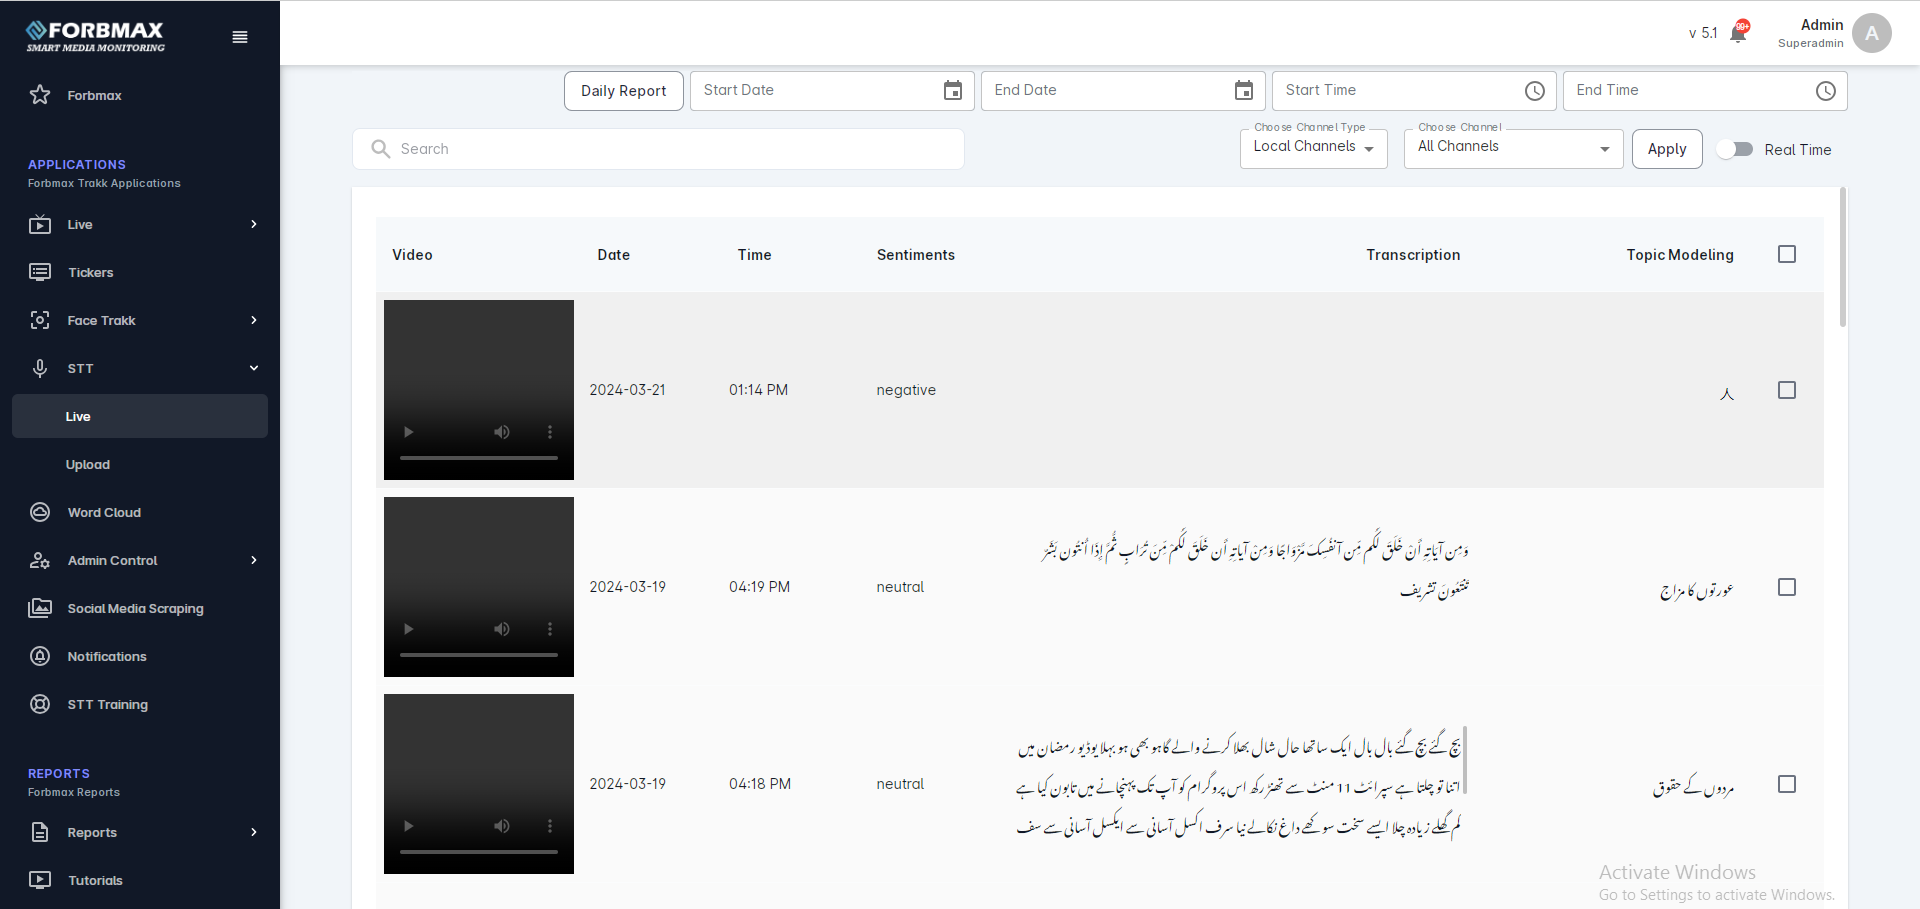
- The Live Stream Transcription Feature operates seamlessly by capturing a continuous 24-hour stream of data, creating automatic 1-minute clips, and transcribing them in real-time. It prioritizes the latest 10 clips, ensuring the transcription reflects the most recent content. The transcriptions are promptly displayed on-screen, offering users immediate access to a concise and up-to-date textual representation of the live stream’s audio content.
- In the STT module, users can activate the real-time filter with a simple click.
- Upon activating the real-time filter, users can confirm their selection by clicking the “Apply” button.
- The screen will then present the latest 10 clips, complete with transcriptions.
2. Transcribe uploaded video:
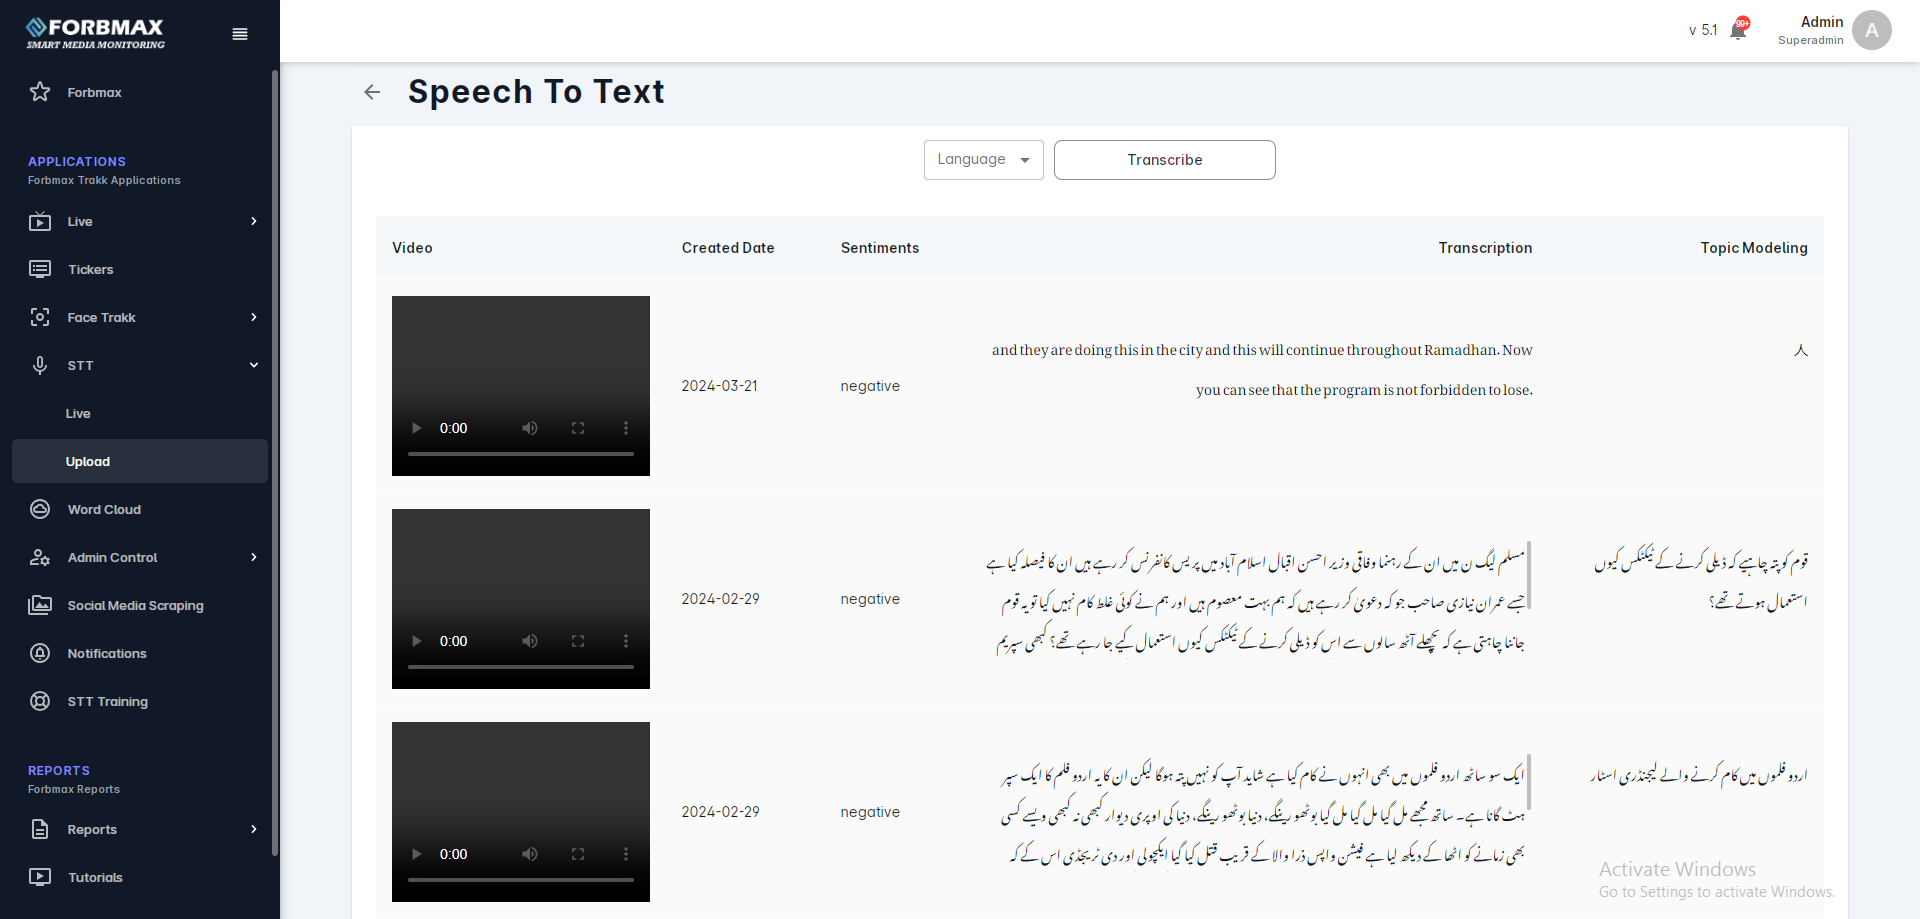
- Within the Upload Module, users have the flexibility to submit videos of their choice for transcription. This empowers users to seamlessly upload any video they prefer, ensuring a personalized and tailored experience in obtaining accurate transcriptions for their content.
- Within the STT module, users can access the Upload sub module.
- Upon entering the Upload sub module, users will encounter an option to upload a video of their choice.
- Users are prompted to select their preferred language for transcription, with options available in both Urdu and English.
- Upon selecting the language, users can initiate the transcription process by clicking the “Transcribe” button.
- Post-processing, the system presents the video along with its transcription in a neatly organized table.
- The table includes additional insights such as sentiment analysis and assigned topics for each transcribed video, enhancing the user’s understanding and engagement with the content.
3.Topic and sentiment:
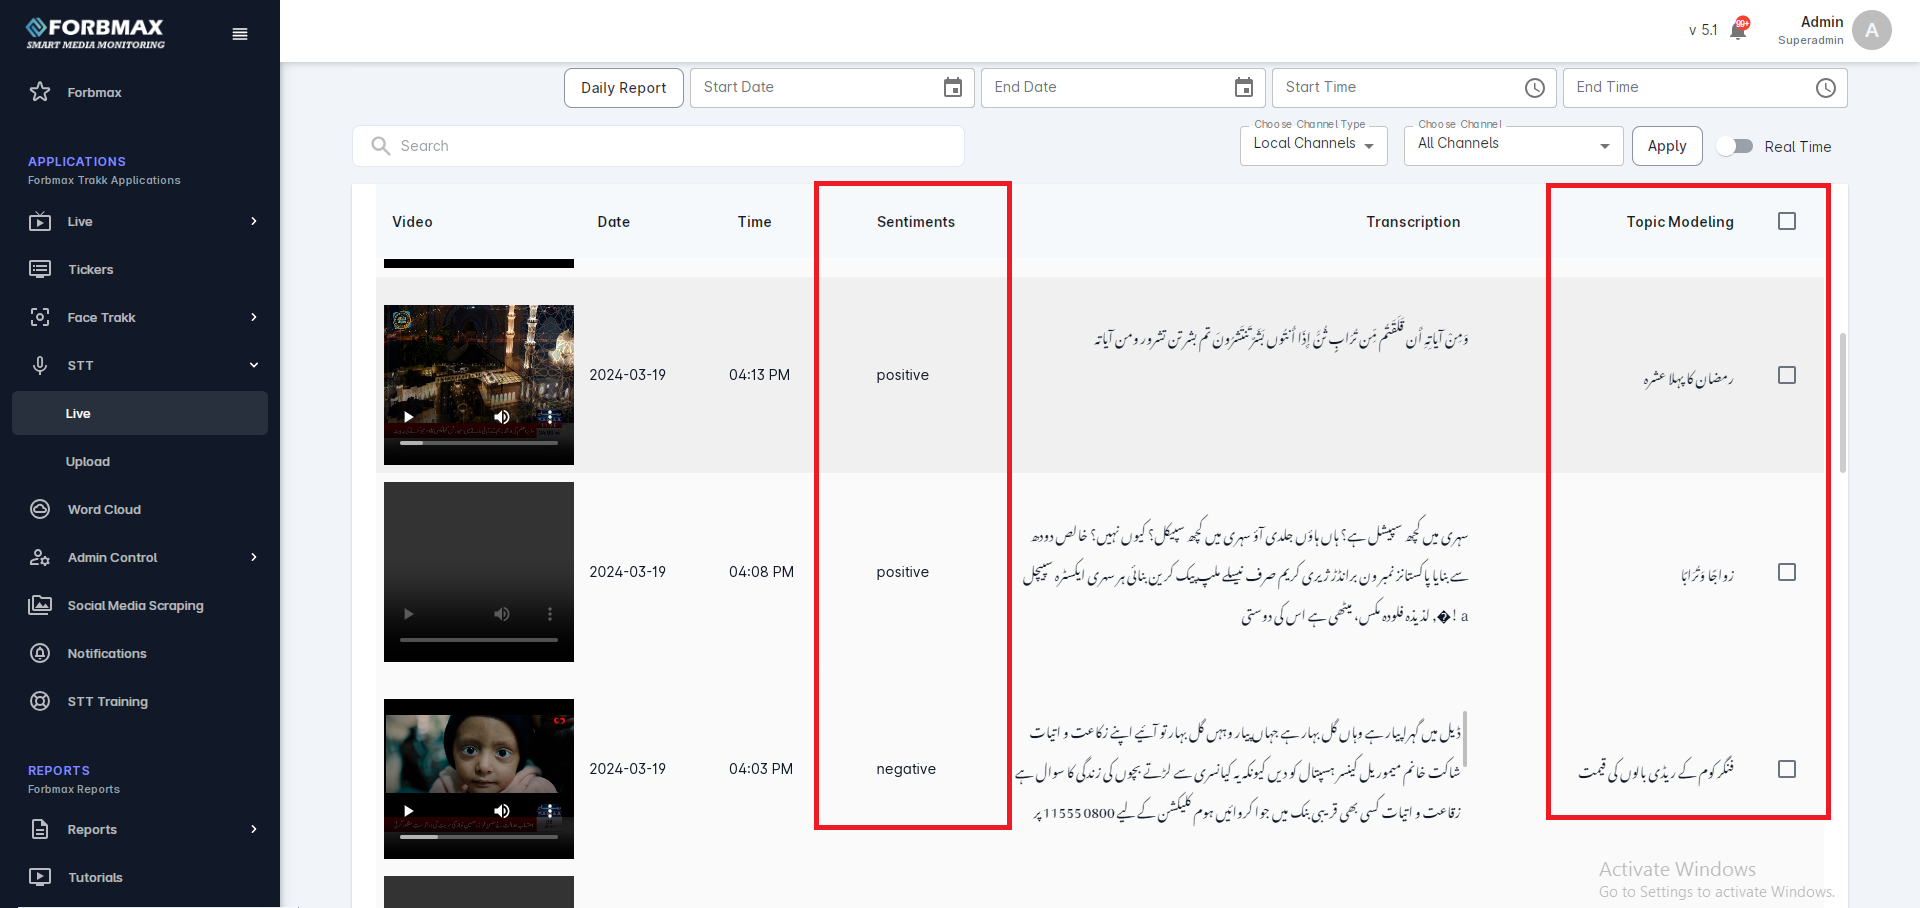
- In the Topic Modeling feature, a table is generated where each one-minute clip’s transcription is accompanied by its corresponding identified topic. Each one-minute clip is enriched with sentiment analysis, displaying whether the content is positive, negative, or neutral.
- Each transcribed clip is accompanied by a clearly labeled topic, conveniently positioned next to its transcription.
- Users have the ability to effortlessly view and access this information, enhancing their understanding of the specific topics associated with each transcription.
4. Daily report configuration:
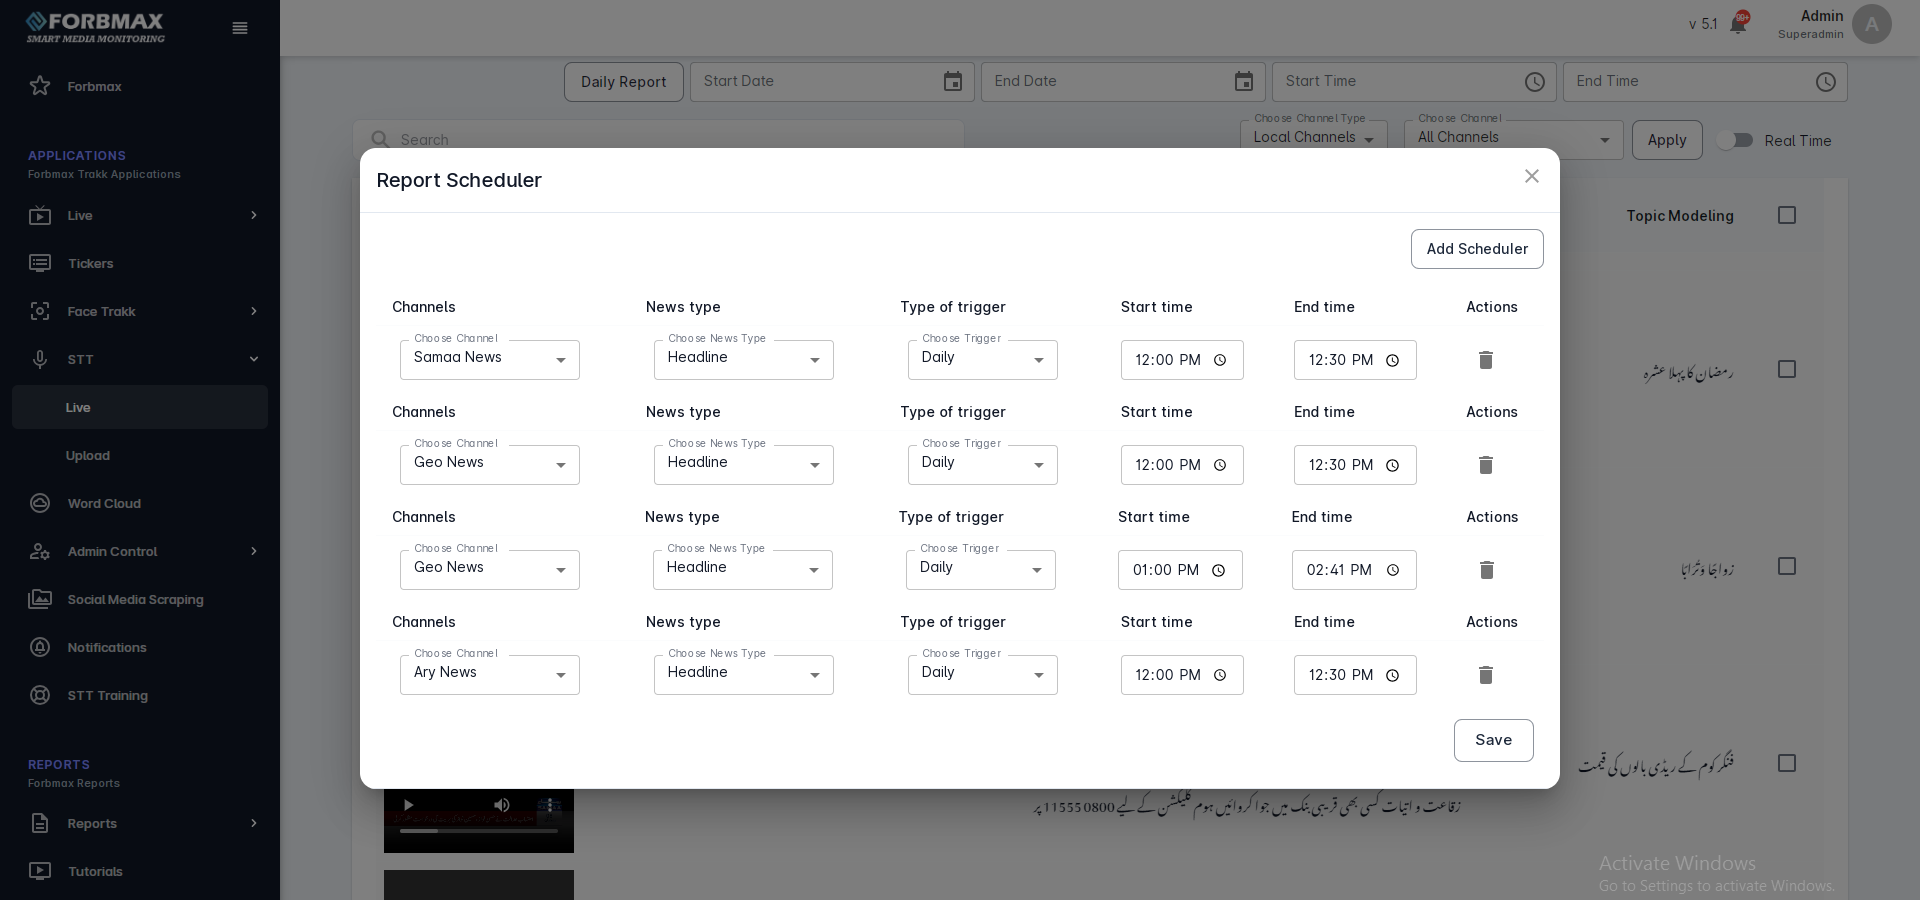
- Within the daily report configurator, users can choose a specific channel along with a designated start and end time. The configurator seamlessly combines 1-minute clips along with their corresponding transcriptions, find their sentiments and topics. This compiled information is then forwarded to the news bulletin report. Users can schedule program to run daily at specific time interval or the they can specify day and specific time for running the program.
- Click on the “Daily Report Configurator” button to initiate the configuration process.
- The Configurator interface will appear for user interaction.
- Click on the “Add Scheduler” option and complete the necessary fields.
- Begin by selecting the desired channel.
- Next, specify the type of news content choose between headlines or talk shows.
- Determine the trigger frequency, opting for either a daily or weekly schedule.
- Set the start and end times for the scheduled report.
- Save the configuration by clicking the designated button.
- Automatically consolidate and save clips daily (for daily triggers) or weekly (for weekly triggers) based on the specified time frame.
- Users can efficiently manage their configurations by deleting any unnecessary schedulers that are no longer needed.
5. Date filter:
- Users can utilize the date filter to narrow down their search and retrieve data exclusively from specific dates of their choosing.
- Utilize the “Start Time Filter” by clicking on the designated option.
- Subsequently, click on “Apply” to reveal data strictly from the selected start date onwards.
- For a more refined view, users have the option to select an end date as well.
- If an end date is chosen, the system will display data exclusively within the specified start and end date range.
6. Time filter:
- With the time filter, users can precisely define their search by selecting a start time and end time. The system will then display transcriptions exclusively from that specific time range directly on the user’s screen, providing a targeted and efficient way to access the desired content.
- Initiate the time filtering process by selecting the “Start Time” option.
- Click on “Apply” to showcase data starting from the chosen time onward.
- Enhance precision by optionally specifying an end time.
- If an end time is provided, the system will exclusively display data within the defined start and end time frame.
7. Channel filter:
- Users have the option to employ the channel filter, enabling them to selectively access transcribed clips from a specific channel of their choice. This feature ensures that users receive precisely the content they seek, streamlining the retrieval process based on their channel preferences.
- Navigate to the “Channel Filter” and click to open the dropdown menu.
- Within the dropdown list, choose the specific channel for the desired data display.
- Opt for the “All Channels” option if the user wishes to view data from every channel.
- For a more targeted approach, select only the particular channel of interest.
READY TO JOIN
Ready to join the revolution? Take the first step towards unlocking the power of AI-driven media intelligence with us. Join our community of forward-thinkers and innovators, and let’s shape the future of digital insights together. Get started today.